I remember fondly the days of nursing my babies, not that long ago. I also remember that I was frustrated with not being able to wear the dresses I liked without excessively exposing my udders to the world. Those nursing days are history now and I had forgotten about the dilemma until I started organizing my sewing supplies and ran across the pattern I had designed for a nursing-accessible AND belly-friendly dress back in the day. With summer upon us, I feel for those nursing mommas who want to wear dresses, so I decided to make up a tutorial and scan my pattern. I also like taking breaks from kids clothes once in awhile and making something for grown-ups; keeps things fresh for me.
Let me know how it goes, okay? I love comments and stories.
 |
| 22 pages total, taped together. |
Cut out your pattern pieces according to your size. I designed this for me at 5'5". Adjust for taller gals just by adding to the bottom of the dress. You will have three pattern pieces.
I hereby judge this pattern skill level as EASY!
Time to complete: not too long once you get the pattern taped together. Maybe 2 hours?
For materials, you will need:
- 2 yards of 60" stretchy jersey-type knit fabric---buy 2 1/4 yard if you are taller than 5'4" or just would feel more comfortable working with extra.
- 1/4 yard of coordinating rib knit
- half inch wide elastic
- thread
 |
| My choice in fabric, and I just noticed it looks a lot like my blog background! This is a cotton knit from Fields Fabric! You should check them out :) |
Wash and dry your fabric first. Do it! If you like to line-dry, hang it length-wise down the middle so it is draped evenly on both sides of the line. It will help when you lay out your pattern later.

Lay out your fabric on a large surface. Take your time and get it all smoothed out. Make folds for your "cut on fold" instructions by folding your selvage in toward the center. Lay out your pattern pieces so they fit AND ensure that the stretch is horizontal!
Here you can see how the selvages are folded into the center and the stretch is horizontal. Yes, I use strawberry jam to weight down my pattern pieces. My pattern weights work well, too, but weren't handy.
VERY IMPORTANT! It must stretch around you and not down your body.
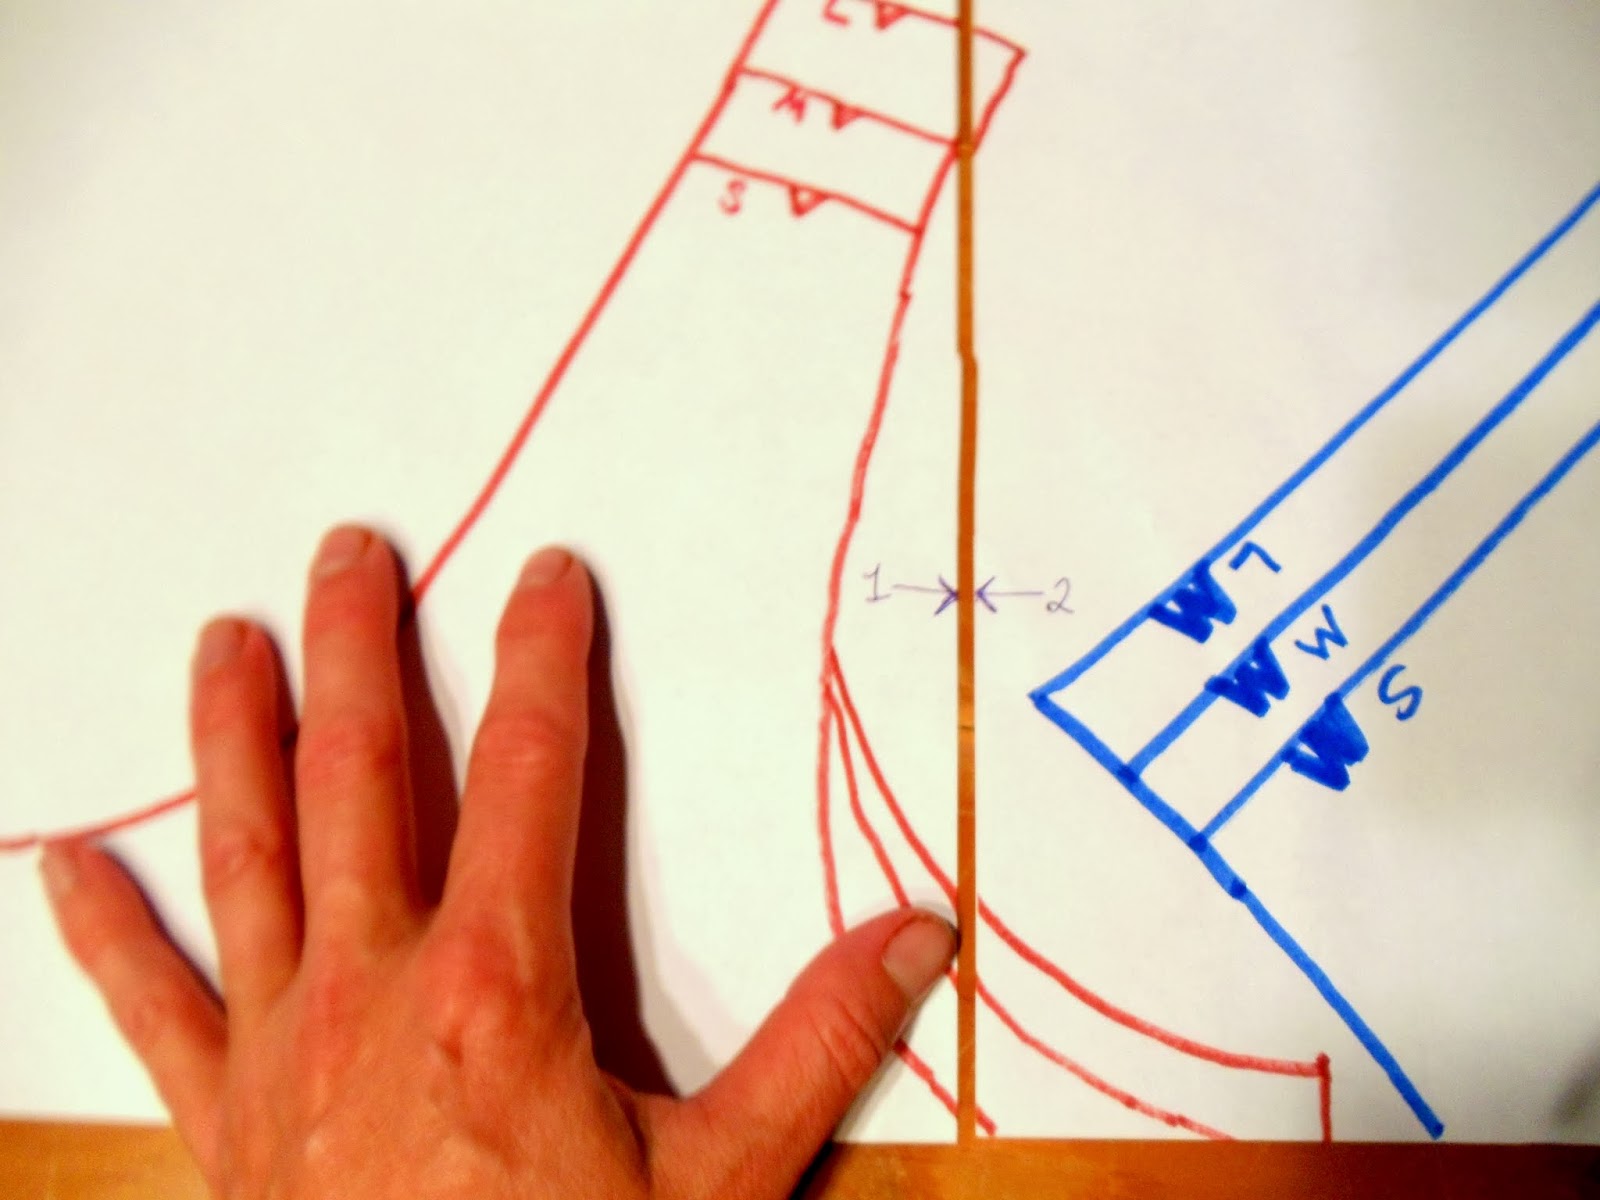
I just realized I forgot to draw <------stretch-------> references on the pattern pieces. Darn it. OK, we'll get though this. The larger pieces marked LOWER FRONT and BACK just stretch horizontally. No biggie.
 |
| Laying out pattern pieces, bottom pieces very close to the lower edge of your fabric. |

For the UPPER FRONT, take page 3 of your pattern pieces and underline where it says "upper front cut 2", just right under the words "cut 2"; then draw little arrows on either end of your underline. There. See what I did there? ---->
Weight down your pattern pieces with weights or canned goods, as shown. Draw around each piece with a washable marker.
Cut out LOWER FRONT and BACK pieces first. Mark dots and snip notches (see next image). Using the remaining fabric, refold it and fit your UPPER FRONT pattern on the fabric. Weight it down, trace around, and cut. Now you will have 4 pieces (back, lower front, upper front and upper front).
Of note: I used to be afraid of knits. I was told by my mother that they are scary to sew and avoid them whenever possible. So I was wrong! Use a ball point needle, a zig zag stitch if you don't have a serger, and stretching just a tiny bit as you sew. Knits can be very forgiving and a really nice choice, so fear not. Moving on...
Now it is time to cut your rib knit fabric. Mine was a tube of fabric, so I cut down the side so it was a flat single layer. Next, cut it into 2" wide strips. Fold each strip down the center and
press so you have 1" wide folded strips. Keep your iron and distilled water handy, you'll be using it soon.
Get out your sewing machine....it's time! Use your #14 ball point needle on your machine and a zig zag stitch. You can also use a serger for a lot of the construction if you prefer.
If you are wanting to boost your confidence, find a great tutorial and pictures for how to attach rib knit to a garment, check out
http://www.burdastyle.com/techniques/sew-a-rib-knit-band,

Right side up, lay out BACK piece. Wrong sides up, lay UPPER FRONT pieces, matching shoulders/notches.


Stitch shoulder seams, using a 5/8 inch seam using a zig-zag or a stretch stitch according to your machine's guide, or serge. I used the stretch stitch function, you know, the one that looks like lightning bolts.
 |
| shoulder seams stitched at 5/8" |
Begin pinning the rib knit strips along the UPPER FRONT and around the BACK neckline, then onto the other UPPER FRONT, matching edges, as shown. Stretch the rib knit JUST SLIGHTLY as you pin...not too much. You want it to recover when you are using your dress for its purpose later! I got ridiculously wide rib knit that fits the entire length, but if you didn't, stitch some of your strips together for this length of rib knit-meets-dress.
 |
| rib knit strip pinned around the UPPER FRONT, BACK neck, and onto the other UPPER FRONT |
 |
| wrong side of fabric, showing the stitched edge of rib knit |
Stitch or serge edges, then press out to form outside edge.
 |
| here, you can see that I pinned rib knit to the long, unnotched edge. |
On the lower edge of the UPPER FRONT pieces, pin strips of the rib knit, then stitch or serge.
*If I'm not clear on any of this, please email me or comment and I will see if I can clarify*
 |
| UPPER FRONT pieces crossed over on top of the BACK piece |
Cross UPPER FRONT pieces again over the BACK piece, matching notches and dots. Pin in place. Set aside, because now....
Let's attend to the LOWER FRONT of the dress. First of all, you are going to want to attach your elastic to the top wrong side as indicated on the pattern. To determine how much elastic is necessary here, take a length of elastic and stretch it across your front, mid-underarm to mid-underarm, just beneath the bottom of your bra. Make sure it is stretched comfortably but snugly as it will be responsible for keeping the lower part of the dress up and supported. Take that length of elastic, add an inch just for good measure, and make the cut. Pin one end of the elastic to the dot on the wrong side of the UPPER FRONT; pin the other end of the elastic at the other dot on the side. So your elastic is pinned right up there along the upper edge of the UPPER FRONT, dot to dot, on the wrong side. Zig-zag stitch that elastic, stretching it as you go so it is even along the upper edge. Nicely done! Admire your work and return to....
 |
| LOWER FRONT with elastic zig zag stitched onto top between dots |
 |
| close-up of the zig zag stitch along the upper edge of the LOWER FRONT |
UPPER FRONT/BACK pieces. Lay the LOWER FRONT piece, right side down,
matching the dots and notches along the sides. So you will have LOWER FRONT, then UPPER FRONT overlaps, then BACK, from top to bottom. Pin. Stitch sides, using a 5/8 inch seam, from top to bottom. Make sure to catch in the ribbed knit edges in those side seams; I found that to be tricky, but it might just be me. Anyway, good luck!
 |
| LOWER FRONT on top of the UPPER FRONTS and BACK, matching notches and dots and stitched down the sides. |
Let's attack those arm openings. Remember the great technique mentioned earlier? That's a good one to get this started. Let's do it!
 |
| attaching a rib knit cuff to the arm opening....a summary. |
I'm cool with leaving the dress hem raw as it won't unravel. It's your call. If you choose to hem, many people would recommend using a double needle and a walking foot. Zig zag is also cool, or just running the edge through the serger. You could even stretch the fabric as you serge and give it that scalloped edge. Ah, the possibilities!
So you see how it crosses over in the front? There is nursing access there....NOT over the top,NOT underneath; right there between the UPPER FRONT pieces (not shown on model).
Nursing access? Check. Belly accommodation ? Yep. Nice dress for many occasions? I like to think so.
Stay cool, my fellow mommas!
PS...this is probably a good time to tell you that, in the event that you want this dress really badly but don't want to/don't know how to sew, contact me on the contact form and we'll see what we can do. I've never offered this before, so excuse the bumbling around and the un-savvy nature; I just love to sew and will help make it happen for you. Much love!
mun


 Slide the hat band over the body of the hat so the bottom edges of both are lined up and the seams are matched.


 Lay out your fabric on a large surface. Take your time and get it all smoothed out. Make folds for your "cut on fold" instructions by folding your selvage in toward the center. Lay out your pattern pieces so they fit AND ensure that the stretch is horizontal!

 For the UPPER FRONT, take page 3 of your pattern pieces and underline where it says "upper front cut 2", just right under the words "cut 2"; then draw little arrows on either end of your underline. There. See what I did there? ---->


